|
<< Click to Display Table of Contents >> Master Settings |
  
|
|
<< Click to Display Table of Contents >> Master Settings |
  
|
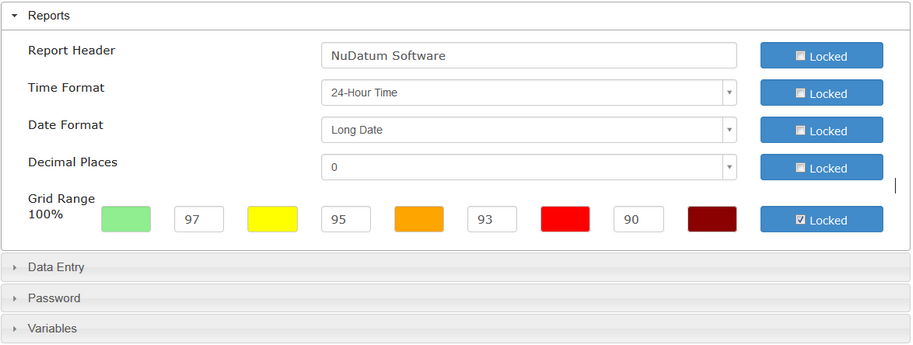
Master Settings are used as the default settings for all site datasets. Site Settings may be configured differently than the Master Settings unless the setting is locked in the Master Settings screen.
Settings are broken up into four groups: Reports, Data Entry, Passwords, and Variables. Click on the header bar to expand the group of settings.
Lock settings to prevent them from being changed in the Site Settings.
Report Settings

|
Usually the name of the observation process or team name. This name appears at the top of all reports. |
||
|
Choose between Short Date Format (1/1/2001) and Long Date Format (1-Jan-2001). |
||
|
Choose between 24-Hour Time (17:45) and 12-Hour Time (5:45pm). |
||
|
Determines the number of decimal places displayed in percentage measurements on reports. |
||
|
Break point for Grid Chart Reports. Each number represents the Percent Safe range for the adjacent colors. |
* These settings affect only the way that values are displayed and not the manner they may be entered into the system.
Data Entry Settings

|
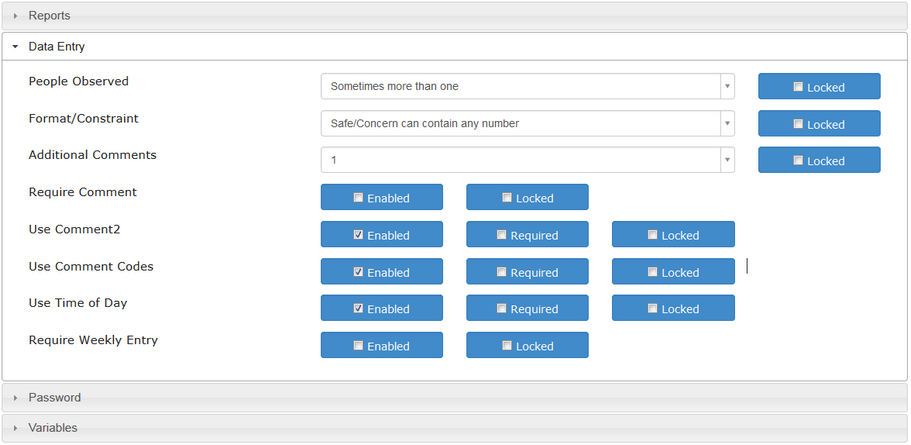
Enables or disables the People tracking system. If Observations are always of 1 person or you do not wish to track People, then set to Always One Person. |
||
|
The format of data entered regarding the safety of a behavior. This can either be a number or a checkbox. There are several options for each depending on what constraints are preferred. |
||
|
Number of additional comments listed on the bottom of the data entry screen. |
||
|
If enabled, requires a comment to be specified in the Data Entry screen for any Behavior with a Concern marked. |
||
|
Adds a second comment field next to each Behavior in the Data Entry screen. The Required option works the same as Require Comment. |
||
|
Enables the Comment Codes system. |
||
|
Enables the Time of Day field in the Data Entry screen. The Required option requires a time to be specified before a new Observation can be saved. |
||
|
If enabled requires users to input observations the same week they occur enforcing timely entry of data. |
Password Settings

|
Number of days before a password expires and requires user to set a new password. Set to 0 to disable this feature. |
||
|
Number of failed login attempts that can occur before a user is locked out of their account and is forced to reset their password. |
||
|
Minimum number of characters that a password must contain |
||
|
Number of complexity rules that must be contained in the password. If less than 3, users can choose which rules they want to use. |
When resetting a password the new or temporary password may not meet these requirements but any password set that does not meet these requirements will be required to be changed on the next login.
Variable Settings

|
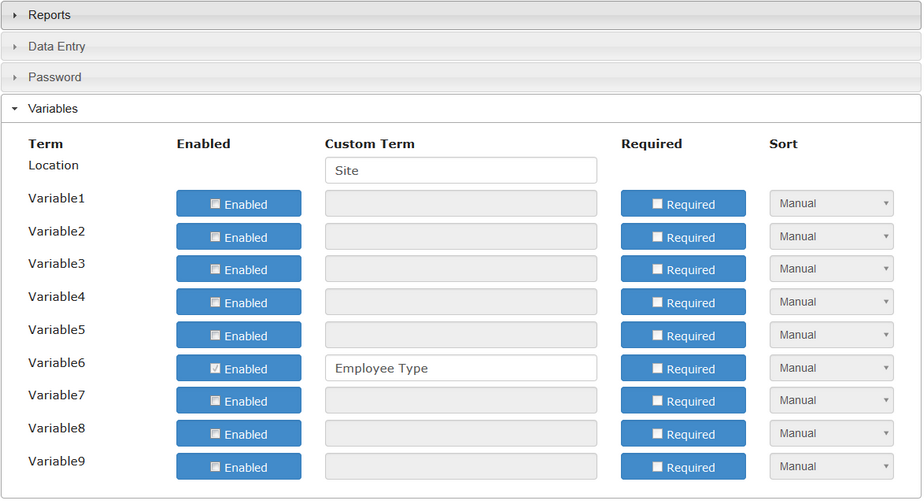
Name associated to Site Datasets. |
||
|
Name for Observers. Required option does not allow Observations to be saved unless an Observer was specified. |
User-Defined Variables
The remaining settings are for Master User-Defined Variables (UDVs). User-Defined Variables configured in Master Settings will appear to all Site Datasets. Master UDVs are also available for Report Data Filters when running multi-site reports.
To create a UDV follow these steps:
- Click the Enable control to the left of the UDV you wish to enable.
- Enter a name for the UDV, for example "Employee Type"
- Click the Required control if you want users to always specify a value for this UDV when entering data.
- Change the Sort option to Manual if you wish the UDV items to be sorted in way other than alphabetical.
- The new UDV will appear in the Variables menu. Select it to enter the list of values.
- The UDV will now appear on the Data Entry screen for all Site Dataset users and all checklists.